Gradle Build Files in Android 第二章
從創(chuàng)建項(xiàng)目到發(fā)布
2.1 Setting Project Properties
問題
如何通過ext節(jié)點(diǎn)把一些常量從build.gradle中移除加入到gradle.properties蚁鳖,或者在控制臺(tái)-p設(shè)置值。
解決方法
-
在
build.gradle中通過ext把例如版本號(hào)薇芝,版本名集中設(shè)置难礼。例如:
    ext {
      appcompat_version = '24.2.1'
      versionCodes=13
      versionNames='2.3'
    }

使用:

    defaultConfig {
       applicationId "com.branch.www.gradledemo"
       minSdkVersion 18
       targetSdkVersion 24
       versionCode versionCodes
       versionName versionNames
    }

或

    compile("com.android.support:appcompat-v7:$appcompat_version")
-
使用gradle.properties
例如在
gradle.properties加入:login='user' pass='my_long_and_highly_complex_password'然后在
build.gradle中使用repositories { maven { url 'http://repo.mycompany.com/maven2' credentials { username 'user' password 'password' } } }或你可以在控制臺(tái)使用
-P輸入login,'password'參數(shù)給properties設(shè)值雷酪。gradlew -Plogin=me -Ppassword=this_is_my_password assembleDebug
2.2 轉(zhuǎn)換Eclipse Android項(xiàng)目到Android Studio
問題
早期都是使用Eclipse開發(fā)晃痴,現(xiàn)在想要使用Android Studio踢步。
解決方法
Android Studio自帶導(dǎo)入向?qū)鳎鶕?jù)向?qū)б徊揭徊阶觥?/p>
2.3 轉(zhuǎn)換Eclipse Android項(xiàng)目到Android Studio通過Eclipse
問題
早期都是使用Eclipse開發(fā)冬阳,現(xiàn)在想要使用Android Studio蛤虐。(推薦使用2.2方式)
解決方法
右鍵項(xiàng)目Export->Generate Gradle build files->選擇這個(gè)項(xiàng)目下的所有l(wèi)ibrary->finish
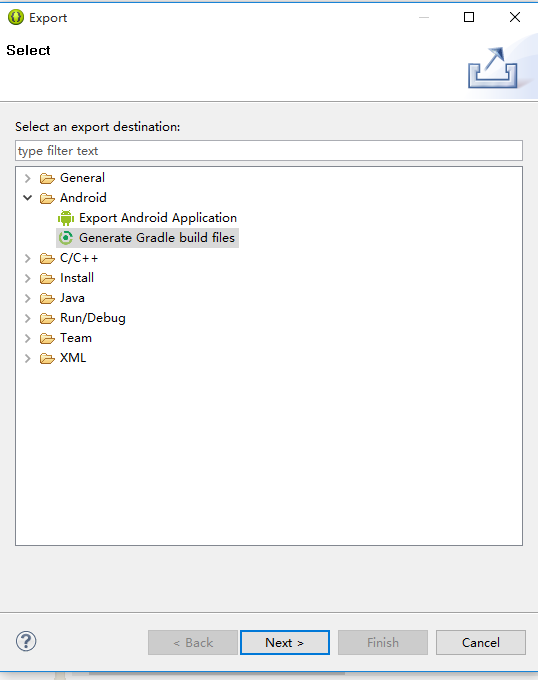
然后就會(huì)生成一個(gè)build.gradle
apply plugin: 'android'

dependencies {
    compile fileTree(dir: 'libs', include: '*.jar')
    compile project(':appcompat_v7')
}

android {
    compileSdkVersion 24
    buildToolsVersion "23.0.3"

    sourceSets {
        main {
            manifest.srcFile 'AndroidManifest.xml'
            java.srcDirs = ['src']
            resources.srcDirs = ['src']
            aidl.srcDirs = ['src']
            renderscript.srcDirs = ['src']
            res.srcDirs = ['res']
            assets.srcDirs = ['assets']
        }

        // Move the tests to tests/java, tests/res, etc...
        instrumentTest.setRoot('tests')

        // Move the build types to build-types/<type>
        // For instance, build-types/debug/java, build-types/debug/AndroidManifest.xml, ...
        // This moves them out of them default location under src/<type>/... which would
        // conflict with src/ being used by the main source set.
        // Adding new build types or product flavors should be accompanied
        // by a similar customization.
        debug.setRoot('build-types/debug')
        release.setRoot('build-types/release')
    }
}
2.4 更新Gradle 版本
問題
根據(jù)需要更新Gradle版本
解決方法
寫wrapper或修改gradle properties url。
-
添加一個(gè)
wrappertask到build.gradletask wrapper(type: Wrapper) { gradleVersion = 2.2 }修改版本后在控制臺(tái)執(zhí)行
gradlew wrapper就可以使用新的gradlew版本肝陪。 -
或修改gradle/wrapper 目錄下的.properties
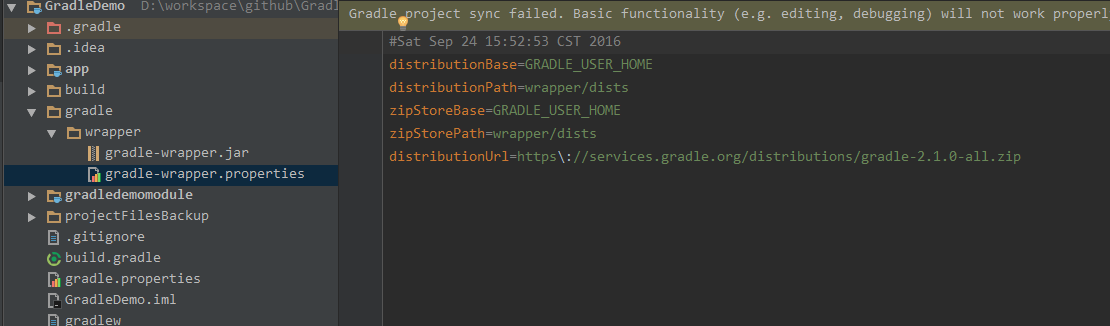 uppdate_newer_gradle_version
更改相應(yīng)的版本即可驳庭。
2.5 在不同項(xiàng)目直接共享設(shè)置
問題
在一個(gè)項(xiàng)目中有多個(gè)library項(xiàng)目,可以去除這些见坑,modules重復(fù)的設(shè)置嚷掠。
解決方法
-
在頂層
build.gradle中定義了allprojects節(jié)點(diǎn)allprojects { repositories { jcenter() } }果在單個(gè)項(xiàng)目中如果沒有特殊情況則不需要重復(fù)定義倉(cāng)庫(kù)。
-
使用
subprojects由于gradle是多項(xiàng)目工程荞驴,如果使用
subprojects則可以一起定義所有l(wèi)ibrary項(xiàng)目設(shè)置不皆。subprojects { apply plugin: 'com.android.library' }則所有l(wèi)ibrary可以去掉
apply plugin
2.6 簽名APK包
問題
經(jīng)過正式簽名發(fā)布App到應(yīng)用市場(chǎng)
解決方法
創(chuàng)建keystore,使用它簽名APK熊楼。使用signingConfigs配置如下:
    android {
        // ... other sections ...
        signingConfigs {
            release {
                keyAlias 'my_alias'
                keyPassword 'password'
                storeFile file('/Users/kousen/keystores/myapp.keystore')
                storePassword 'password'
            }
        }
    }
然后在buildTypes中設(shè)置對(duì)應(yīng)的簽名
    android {
        // ... other sections ...
        buildTypes {
            release {
                // ... other settings ...
                signingConfig signingConfigs.release
            }
        }
    }
在控制臺(tái)輸入gradlew assembleRelease則會(huì)build一個(gè)簽名包到/build/outputs/apk目錄下霹娄。
2.7 使用Android Studio打包
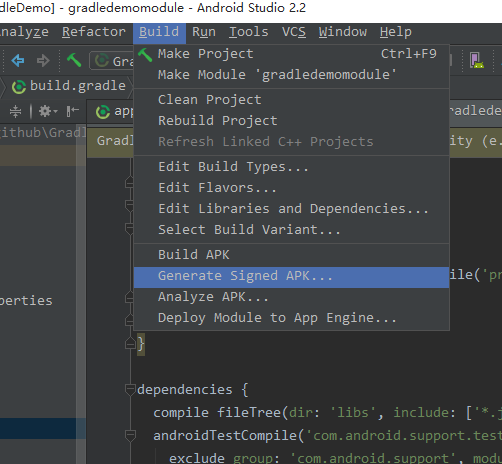
如果沒有keystore則根據(jù)向?qū)?chuàng)建能犯。
