作者:Arthur Knopper,原文鏈接,原文日期:2015-08-31
譯者:lfb_CD吃媒;校對(duì):千葉知風(fēng);定稿:shanks
Core Graphics是Cocoa和Cocoa Touch所共有的API吕喘。它允許你在畫布上繪制圖形對(duì)象赘那。在此篇教程中,我們會(huì)繪制一些標(biāo)準(zhǔn)的圖形氯质,比如三角形或者圓形募舟。教程運(yùn)行在 iOS 9 和 Xcode 7 下。
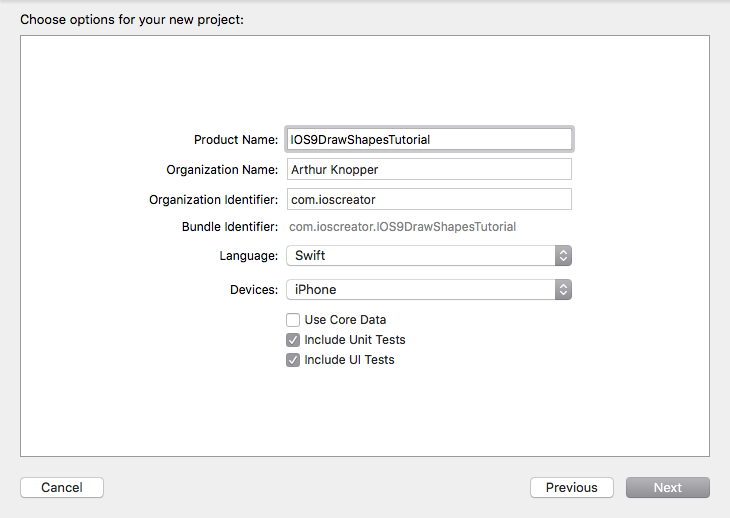
打開 Xcode 并創(chuàng)建一個(gè)new Single View Application項(xiàng)目闻察。項(xiàng)目名稱為IOS9DrawShapesTutorial拱礁,接著填上你的Organization Name和Organization Identifier琢锋,選擇 Swift 語言,確保在設(shè)備一欄只選擇了 IPhone呢灶。
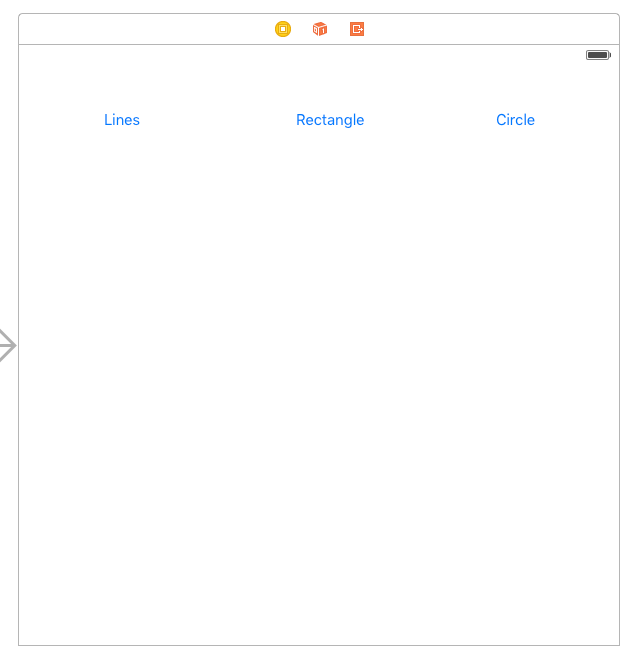
打開故事板吴超,在主視圖中拖入三個(gè)按鈕,使他們水平對(duì)齊鸯乃,并分別設(shè)置title為"Lines, Rectangle, Circle"鲸阻。之后你的故事板內(nèi)容應(yīng)該像下面這樣:
選中所有按鈕,打開Attributes Inspector(屬性檢測(cè)器)飒责。在View部分給從左到右的按鈕添上"0,1,2"的tag赘娄。tag是我們后面才需要的,我們可以通過tag的值得知哪個(gè)按鈕被按下了宏蛉。

打開Assistant Editor(關(guān)聯(lián)面板)遣臼,并確保ViewController.swift文件是打開著的。按住 Ctrl鍵拾并,把Lines按鈕拖出到ViewController.swift文件中揍堰,并創(chuàng)建下面的Action

選中其它的按鈕,按住Ctrl鍵并拖到ViewController類的IBAction方法里(剛剛創(chuàng)建的那個(gè)Action)嗅义。之后我們點(diǎn)擊每一個(gè)按鈕就會(huì)觸發(fā)這里的IBAction方法屏歹。繪制的圖形會(huì)呈現(xiàn)在一個(gè)自定義的視圖中。接下來之碗,我們?yōu)轫?xiàng)目添加一個(gè)新文件蝙眶。選中File ->New File ->iOS ->Source ->Cocoa Touch Class。類名稱為"ShapeView",確保父類為UIView褪那。

打開ShapeView.swift文件幽纷,添加下面的屬性。
var currentShapeType: Int = 0
currentShapeType屬性是用于選擇正確的方法畫出對(duì)應(yīng)的對(duì)象博敬。接著添加初始化方法:
init(frame: CGRect, shape: Int) {
    super.init(frame: frame)
    self.currentShapeType = shape
}

required init?(coder aDecoder: NSCoder) {
    fatalError("init(coder:) has not been implemented")
}
當(dāng)自定義視圖被初始化的時(shí)候友浸,tag的值會(huì)決定繪制的圖形類型。drawRect方法會(huì)在自定義視圖繪制的過程中調(diào)用偏窝。
override func drawRect(rect: CGRect) {
    switch currentShapeType {
    case 0: drawLines()
    case 1: drawRectangle()
    case 2: drawCircle()
    default: print("default")
    }
}
接下來收恢,實(shí)現(xiàn)繪圖的方法:
func drawLines() {
    //1
    let ctx = UIGraphicsGetCurrentContext()

    //2
    CGContextBeginPath(ctx)
    CGContextMoveToPoint(ctx, 20.0, 20.0)
    CGContextAddLineToPoint(ctx, 250.0, 100.0)
    CGContextAddLineToPoint(ctx, 100.0, 200.0)
    CGContextSetLineWidth(ctx, 5)

    //3
    CGContextClosePath(ctx)
    CGContextStrokePath(ctx)
}

func drawRectangle() {
    let center = CGPointMake(self.frame.size.width / 2.0, self.frame.size.height / 2.0)
    let rectangleWidth:CGFloat = 100.0
    let rectangleHeight:CGFloat = 100.0
    let ctx = UIGraphicsGetCurrentContext()

    //4
    CGContextAddRect(ctx, CGRectMake(center.x - (0.5 * rectangleWidth), center.y - (0.5 * rectangleHeight), rectangleWidth, rectangleHeight))
    CGContextSetLineWidth(ctx, 10)
    CGContextSetStrokeColorWithColor(ctx, UIColor.grayColor().CGColor)
    CGContextStrokePath(ctx)

    //5
    CGContextSetFillColorWithColor(ctx, UIColor.greenColor().CGColor)
    CGContextAddRect(ctx, CGRectMake(center.x - (0.5 * rectangleWidth), center.y - (0.5 * rectangleHeight), rectangleWidth, rectangleHeight))

    CGContextFillPath(ctx)
}

func drawCircle() {
    let center = CGPointMake(self.frame.size.width / 2.0, self.frame.size.height / 2.0)
    let ctx = UIGraphicsGetCurrentContext()
    CGContextBeginPath(ctx)

    //6
    CGContextSetLineWidth(ctx, 5)

    let x:CGFloat = center.x
    let y:CGFloat = center.y
    let radius: CGFloat = 100.0
    let endAngle: CGFloat = CGFloat(2 * M_PI)

    CGContextAddArc(ctx, x, y, radius, 0, endAngle, 0)

    CGContextStrokePath(ctx)
}
- 這里的
Graphic Context就是你繪圖的畫布。如果你想在一個(gè)視圖上繪圖祭往,那么view就是你的畫布伦意。這里我們需要得到一個(gè)Graphic Context的引用。 -
path就是一些線條,弧線和曲線的集合,你可以在當(dāng)前畫布使用它們來構(gòu)建的復(fù)雜對(duì)象硼补。這里我們繪制了一些線條并設(shè)置了線條的寬度為 5默赂。 - 此處關(guān)閉
path,并繪制圖像到畫布上括勺。 -
CGContextAddRect方法給我們繪制了一個(gè)長方形缆八,并且外框的顏色為灰色曲掰。 - 這里定義了一個(gè)相同的長方形,并填充綠色到內(nèi)部奈辰。
-
CGContextAddArc繪制了一個(gè)圓形栏妖。
接著,在ViewController.swift文件中實(shí)現(xiàn)buttonPressed方法
@IBAction func buttonPressed(sender: UIButton) {
    let myView = ShapeView(frame: CGRectMake(50, 200, 280, 250), shape: sender.tag)
    myView.backgroundColor = UIColor.cyanColor()
    view.addSubview(myView)
}
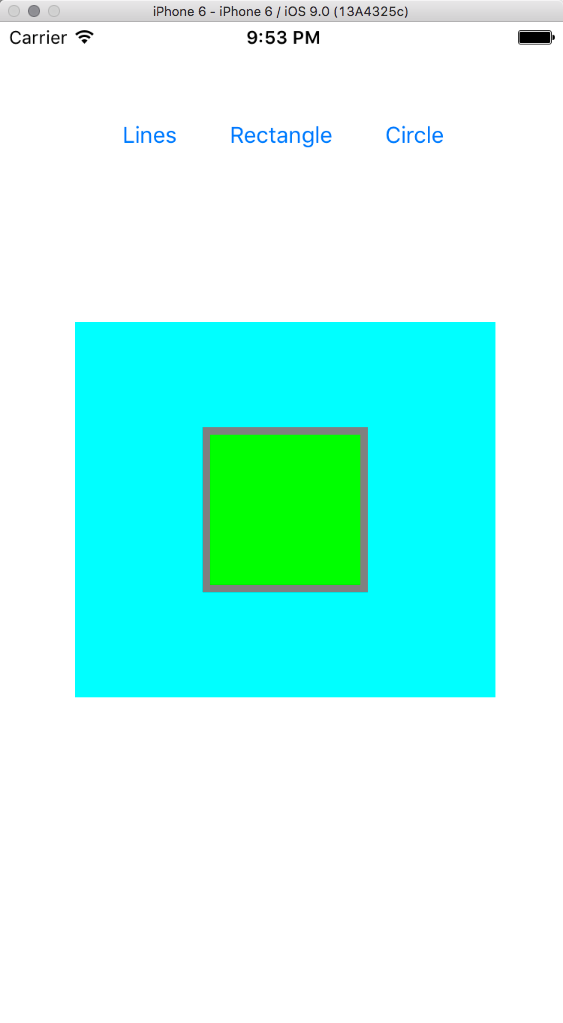
編譯并運(yùn)行程序奖恰,點(diǎn)擊不同的按鈕來繪制不同的圖形吊趾。
你可以在Github上下載IOS9DrawShapesTutorial的代碼。
本文由 SwiftGG 翻譯組翻譯瑟啃,已經(jīng)獲得作者翻譯授權(quán)论泛,最新文章請(qǐng)?jiān)L問 http://swift.gg。
