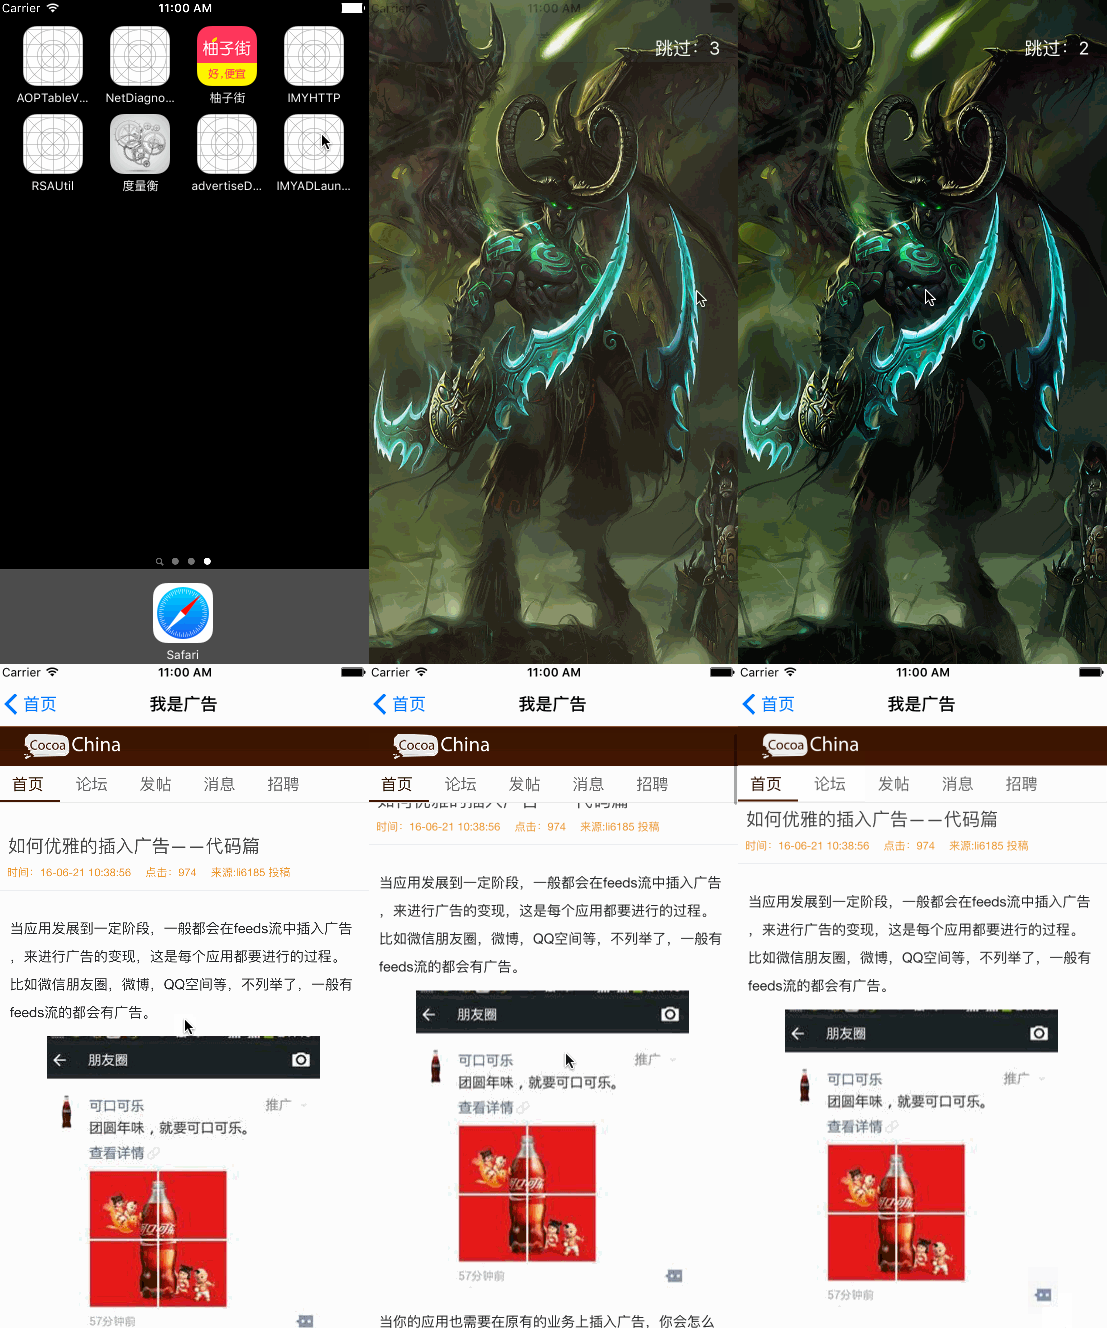
最近在CocoaChina上看到蠻多小伙伴分享了自己的開屏廣告經(jīng)驗(yàn)和代碼。
分分鐘解決iOS開發(fā)中App啟動(dòng)廣告的功能亮曹,
App啟動(dòng)加載廣告頁面思路
代碼還是不錯(cuò)的宵距,但是個(gè)人覺得然低,上訴代碼的耦合性還是太強(qiáng)了英遭,需要對(duì) AppDelegate 和 ViewController 等代碼進(jìn)行入侵。如果按照模塊化方式來開發(fā)企蹭,后續(xù)廣告要擴(kuò)展和維護(hù)都是很艱難的白筹,因?yàn)槟阋獡?dān)心你埋入的那些代碼被其他人員改動(dòng)了。
下面是我使用的一套方案谅摄。真正做到模塊化徒河,即插即用!
實(shí)現(xiàn)原理
自啟動(dòng) & 監(jiān)聽
///在load 方法中螟凭,啟動(dòng)監(jiān)聽虚青,可以做到無注入
+ (void)load
{
    [self shareInstance];
}
- (instancetype)init
{
    self = [super init];
    if (self) {

        ///如果是沒啥經(jīng)驗(yàn)的開發(fā),請(qǐng)不要在初始化的代碼里面做別的事螺男,防止對(duì)主線程的卡頓棒厘,和 其他情況

        ///應(yīng)用啟動(dòng), 首次開屏廣告
        [[NSNotificationCenter defaultCenter] addObserverForName:UIApplicationDidFinishLaunchingNotification object:nil queue:nil usingBlock:^(NSNotification * _Nonnull note) {
            ///要等DidFinished方法結(jié)束后才能初始化UIWindow,不然會(huì)檢測是否有rootViewController
            dispatch_async(dispatch_get_main_queue(), ^{
               [self checkAD];
            });
        }];
        ///進(jìn)入后臺(tái)
        [[NSNotificationCenter defaultCenter] addObserverForName:UIApplicationDidEnterBackgroundNotification object:nil queue:nil usingBlock:^(NSNotification * _Nonnull note) {
            [self request];
        }];
        ///后臺(tái)啟動(dòng),二次開屏廣告
        [[NSNotificationCenter defaultCenter] addObserverForName:UIApplicationWillEnterForegroundNotification object:nil queue:nil usingBlock:^(NSNotification * _Nonnull note) {
            [self checkAD];
        }];
    }
    return self;
}
iOS的通知是一個(gè)神器下隧,它會(huì)發(fā)出應(yīng)用的啟動(dòng)奢人,退到后臺(tái)等事件通知,有了通知我們就可以做到對(duì)AppDelegate的無入侵淆院。
只有通知還是沒有用的何乎,我們還需要顯示。
核心突破點(diǎn):顯示
- (void)show
{
    ///初始化一個(gè)Window, 做到對(duì)業(yè)務(wù)視圖無干擾支救。
    UIWindow *window = [[UIWindow alloc] initWithFrame:[UIScreen mainScreen].bounds];

    ///廣告布局
    [self setupSubviews:window];

    ///設(shè)置為最頂層抢野,防止 AlertView 等彈窗的覆蓋
    window.windowLevel = UIWindowLevelStatusBar + 1;

    ///默認(rèn)為YES,當(dāng)你設(shè)置為NO時(shí)各墨,這個(gè)Window就會(huì)顯示了
    window.hidden = NO;

    ///來個(gè)漸顯動(dòng)畫
    window.alpha = 0;
    [UIView animateWithDuration:0.3 animations:^{
        window.alpha = 1;
    }];

    ///防止釋放指孤,顯示完后  要手動(dòng)設(shè)置為 nil
    self.window = window;
}
其實(shí)大家一般蓋視圖,習(xí)慣在 KeyWindow 上直接AddSubview贬堵, 其實(shí)這是不好的恃轩。首先KeyWindow 會(huì)被AlertView覆蓋, 還有可能別的業(yè)務(wù)代碼也進(jìn)行了AddSubview 這樣就會(huì)把你的廣告給覆蓋了黎做。
而使用我這種 UIWindow 的初始化叉跛,可以讓你的視圖出現(xiàn)在最頂層,不用怕亂七八糟的業(yè)務(wù)邏輯覆蓋蒸殿。
調(diào)用KeyWindow 還有個(gè)壞處筷厘。下面會(huì)說到。
跳轉(zhuǎn)
其實(shí)倒計(jì)時(shí)跟跳轉(zhuǎn)是個(gè)很普通的功能點(diǎn)伟桅,沒啥說的敞掘。有個(gè)關(guān)鍵點(diǎn)還是要說的 就是KeyWindow的調(diào)用
///不直接取KeyWindow 是因?yàn)楫?dāng)有AlertView 或者有鍵盤彈出時(shí)叽掘, 取到的KeyWindow是錯(cuò)誤的楣铁。
    UIViewController* rootVC = [[UIApplication sharedApplication].delegate window].rootViewController;
    [[rootVC imy_navigationController] pushViewController:[IMYWebViewController new] animated:YES];
其實(shí) [UIApplication sharedApplication].keyWindow 取到的Window 不一定是你想要的。 因?yàn)镵eyWindow 是會(huì)變的更扁,所以勁量使用 [delegate Window] 來獲取顯示的Window盖腕。 做 OS X 的應(yīng)該體會(huì)多點(diǎn)。
在送上一個(gè)擴(kuò)展浓镜,獲取任意ViewController的navigationController
@implementation UIViewController (IMYPublic)
- (UINavigationController*)imy_navigationController
{
    UINavigationController* nav = nil;
    if ([self isKindOfClass:[UINavigationController class]]) {
        nav = (id)self;
    }
    else {
        if ([self isKindOfClass:[UITabBarController class]]) {
            nav = [((UITabBarController*)self).selectedViewController imy_navigationController];
        }
        else {
            nav = self.navigationController;
        }
    }
    return nav;
}
@end
demo(gif圖溃列,會(huì)動(dòng)的。膛薛。)

源碼傳送門:https://github.com/li6185377/IMYADLaunchDemo
美柚公司內(nèi)推听隐,有需要可以私信我:
