在這個(gè)PS教程中戈锻,邁克?斯匹若稍途,一位來自瑞典哥德堡的圖形設(shè)計(jì)師呕童,將向你展示他如何制作一個(gè)“光彩飛濺”的創(chuàng)意設(shè)計(jì)。在這個(gè)來自他作品集的一個(gè)設(shè)計(jì)中意蛀,他將一個(gè)女孩的照片與飛濺的牛奶以及光效美妙地組合在一起耸别。

Step 1
步驟 1
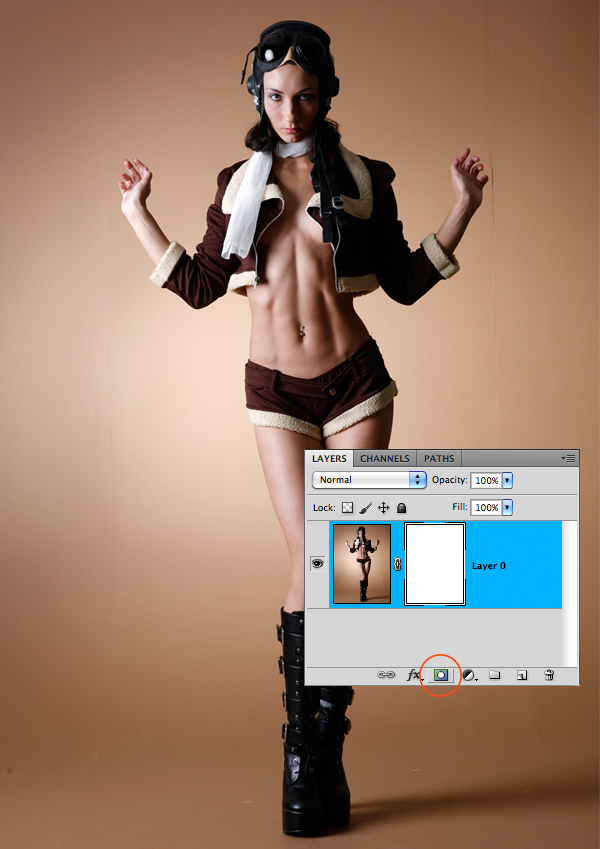
Mask out the girl. Push the button in the circle, so you get the white field in your layer next to your image. Then use pen-tool or a brush with black color to erase the background. (Make sure you draw on the white field and not the picture itself)
對(duì)女孩的照片制作蒙版。
點(diǎn)擊圓圈中按鈕县钥,這樣秀姐,你在照片層中會(huì)得到一個(gè)白色方塊(即蒙版——譯者注)。然后若贮,使用黑色的鋼筆工具或畫筆工具擦除背景省有。(請(qǐng)確認(rèn)你是在白色方塊痒留,而不是在照片本身上進(jìn)行操作。)
Step 2
步驟 2
Make the model grey by going to Image>Adjustments>Hue/saturation. Drag the middle anchor to the grey field. An easier way is to hit cmd+shift+U.
執(zhí)行圖像>調(diào)整>色相/飽和度蠢沿,將中間的錨點(diǎn)拖向灰色區(qū)域伸头,以使模特變?yōu)榛叶取A硪环N更為簡單的方法是按住CMD+SHIFT+U(PC機(jī)中的CTRL鍵通常與蘋果機(jī)中CMD鍵用法一直 ——譯者注)舷蟀。

Create a new white layer and place it in the bottom. Layer>New fill layer>Solid color.
創(chuàng)建新的空白層恤磷,并將其置于底部。對(duì)它執(zhí)行圖層>新建填充涂層>純色(白色——譯者注)野宜。
Then size your model up or down. In this case, I shrunk her a little bit to fit the picture better. Use cmd+T to change the size. (When in use, you can always experiment by holding down shift, ctrl and cmd sometimes to get different results.)
調(diào)節(jié)模特照片的尺寸大小扫步。
通過調(diào)整,我將照片略微縮小匈子,以使它更適合作品锌妻。調(diào)整尺寸的快捷鍵為CMD+T。(在調(diào)整尺寸的狀態(tài)下旬牲,你不妨偶爾嘗試按住shift仿粹、ctrl或cmd鍵,這可以得到不同的效果原茅。)
Step 3
步驟 3
Time to duplicate. Go to Layer>Duplicate Layer or press cmd+J. Then go to Layer>Create Clipping Mask. The top layer should now point down to the layer beneath.
復(fù)制圖層吭历。
執(zhí)行圖層>復(fù)制圖層(模特層),或者按CMD+J擂橘。然后執(zhí)行圖層>創(chuàng)建剪切蒙版∩吻現(xiàn)在,頂部圖層應(yīng)當(dāng)有小箭頭指向下面的圖層通贞。

Step 4
步驟 4
This treatment is for the top layer. Image>Adjustments>Shadow Highlights. Click in the box "show more options". Then change Shadows: Amount to 100 and Adjustments: Midtone Contrast to -100.
對(duì)頂部圖層作處理朗若。執(zhí)行圖像>調(diào)整>陰影/高光。點(diǎn)擊選框“顯示更多選項(xiàng)”昌罩,然后修改陰影數(shù)量為100哭懈,調(diào)整中間調(diào)對(duì)比度為-100。
Step 5
步驟 5
Filter>Blur>Gaussian Blur. Approx 3.0 blur. Then in Blending Mode change the status from Normal to Lighten. Next to the blending mode there's the Opacity box. Make sure it's says 70%.
濾鏡>模糊>高斯模糊茎用,半徑值約為3.0遣总。然后將混合模式從正常改為變亮。不透明度的選框緊靠在混合模式旁轨功,確保其值為70%旭斥。
Also, in the clipping mask field, paint over the face so it's not that blurry.
另外,在這個(gè)剪切蒙版圖層中古涧,用蒙版將臉部覆蓋垂券,使臉部不那么模糊。
If you did everything right, it should look something like the picture below.
如果你的所有步驟都正確羡滑,那么它會(huì)看起來像下面這張圖菇爪。

Step 6
步驟 6
Duplicate the bottom layer and place it on the top. Then place it in the clipping mask.
復(fù)制底部的模特圖層卒暂,并將其置于頂部,然后將其設(shè)為剪切蒙版娄帖。
Then for the top layer Image>Adjustments>Shadow/Highlights. See below for the numbers. And last Blending Mode>Lighten.
然后也祠,對(duì)頂部圖層執(zhí)行圖像>調(diào)整>陰影/高光。參照下圖參數(shù)近速,并且最后執(zhí)行 混合模式>變亮诈嘿。

Step 7
步驟 7
Make a new duplicate from the top layer. This time only use the right hand. Mask away the rest. Then go to Image>Adjustments>Curves. If it's not that white as you wanted it to be, go to Blending Mode and change to Lighten. Duplicate the hand. Mark both hand layers and merge them by Layers>Merge Layers.
復(fù)制頂部圖層。這次只使用模特的右手削葱,將其他部分遮蔽掉奖亚。然后執(zhí)行圖像>調(diào)整>曲線。如果調(diào)整后的樣子沒你想要的那么白析砸,那么將混合模式改為變亮昔字。
復(fù)制這個(gè)右手的圖層。同時(shí)選中兩個(gè)右手圖層首繁,并通過執(zhí)行圖層>合并圖層將它們合并作郭。
Keep the layer in the clipping mask.
將這個(gè)圖層設(shè)為剪切蒙版。

Step 8
步驟 8
Make the background Black. Double click on the layer and go to Color Overlay>Double Click on the red rectangle and choose the color black.
將背景設(shè)為黑色弦疮。
雙擊圖層夹攒,選擇顏色疊加,雙擊紅色方塊胁塞,并選取黑色咏尝。
Time for some splashes. Open up your splash picture in a separate window. Then go to Select>Color Range. Get as much of the content you want and press OK. In many cases the selection is for the things you don't want. To fix that go to Select>Inverse. Now copy the splash into the window we work in.
現(xiàn)在開始制作噴濺效果。
在另一個(gè)窗口打開你的噴濺圖片啸罢,然后執(zhí)行選擇>色彩范圍编检。在得到你想要的選區(qū)之后,點(diǎn)擊確定扰才。在許多情況下允懂,這選區(qū)會(huì)選中的是你并不想要的東西,這時(shí)執(zhí)行選擇>反向來修正它⊙低埃現(xiàn)在累驮,將噴濺圖片拖入我們工作的窗口酣倾。
Make the splash grey by cmd+shift+U. Repeat Step 7 to make it more white.
通過執(zhí)行 CMD+SHIFT+U 將圖片轉(zhuǎn)為灰度舵揭。重復(fù)步驟7,讓它變得更白躁锡。

Step 9
步驟 9
I never use the eraser, only the mask. Use the mask to fix with the splash so it fits the boot. This layer should be on top and not be placed into the model mask.
放棄橡皮擦工具午绳,堅(jiān)持使用蒙版。
使用蒙版來修正噴濺映之,以使其與模特的靴子相協(xié)調(diào)拦焚。另外蜡坊,這個(gè)圖層應(yīng)當(dāng)置于頂部,并且不要放在模特的剪切蒙版中赎败。
Next. Play around with a spray brush. Do however you want here. Change the opacity on some for a good mix of light. Add some special brushes as well. These should be in the mask.
接著秕衙,按照自己的意愿,用飛濺筆刷在四周涂抹僵刮。在不同地方使用不同透明度据忘,以便混合后達(dá)到好的光感。另外搞糕,也可以添加一些其他的特殊筆刷勇吊。要注意的是,這些操作都是在蒙版中進(jìn)行的窍仰。
Keep in mind: The 2 model layers in the mask should always be on the top. The things we put in there from now on, shall be placed in the bottom.
記缀汗妗:兩個(gè)模特層應(yīng)該始終處于頂端,而到現(xiàn)在為止驹吮,我們置入的其他東西應(yīng)當(dāng)放在底部针史。
Step 10
步驟 10
Now we add the splashes again. Bring in new ones or just duplicate the one from before.
現(xiàn)在我們再來添加一些噴濺。置入一張新的噴濺圖片碟狞,或者復(fù)制之前的那一張悟民。

Step 11
步驟 11
Use the spray brush to paint in some colors. One layer for each color.
使用飛濺筆刷在不同的層上添加不同的色彩。

Step 12
步驟 12
Time to fix with the background. Create a new layer above the background layer. Use the Lasso-Tool and draw a triangle shaped form. When it's active, use a brush to paint outside the selected area to get this cool effect.
現(xiàn)在篷就,我們開始修飾背景射亏。
在背景層上方新建一個(gè)層,使用套索工具繪制一個(gè)三角形竭业。當(dāng)三角選區(qū)激活時(shí)智润,用筆刷在選區(qū)外涂抹,以達(dá)到這樣的酷炫效果未辆。


Step 13
步驟 13
Back to a white background again. But with a little extra grey in the middle. Double-click on the layer and follow the picture below.
再次返回白色背景層窟绷,在中間稍微添加些額外的灰色。雙擊圖層咐柜,并設(shè)置下圖參數(shù)兼蜈。


Step 14
步驟 14
More splashes, but this time, put them behind the model and not in the mask.
添加更多的飛濺,不過這次繪制在模特層后面拙友,而不是蒙版當(dāng)中为狸。
Make some Triangles and Circles. I used purple for the triangles and white for the circles. The Opacity is lowered on both symbols. You can find them in your shape-tool options palette.
制作一些三角形和圓形。我在三角形上添加了紫色遗契,為圓形圖上了白色辐棒,并且降低了它們的不透明度。你也可以在形狀工具的選項(xiàng)板里找到這些圖形。
Create a shape with Lasso-tool that is in line with the previous lines in the background and move it up a little. Then you get an extra effect. I used purple color and lowered the opacity to 5%.
用套索工具創(chuàng)建一條線條漾根,讓它存在于之前在背景中制作的那些線條中泰涂,然后將它向上略微移動(dòng)。這樣你就得到了一個(gè)額外的效果辐怕。在這個(gè)線條中逼蒙,我使用了紫色,并將不透明度降低為5% 寄疏。


Step 15
步驟 15
Throw in some balls or whatever you like. I made mine in Illustrator and added some effects with the mesh tool there. Then I pasted them into photoshop and in Blending Mode changed them to Screen.
在作品中放入一些球其做,或者其他什么你喜歡的。我將自己的一些小東西放在Illustrator中赁还,并用網(wǎng)格工具添加了一些效果妖泄。然后,我將它們粘貼到Photoshop中艘策,并將其混合模式改為濾色蹈胡。
Use the brush to paint some shadows in the back. You can also use white to mix it up.
用畫筆在這些東西后面繪制一些陰影,另外朋蔫,你也可以用白色調(diào)和一下這些陰影罚渐。


Step 16
步驟 16
Light effects. I'm gonna show you how to do them. This is a quick lecture. You gonna have to practice a little to master it.
光效。
我將向你演示如何制作那些光效驯妄。但是荷并,這里也只是粗略帶過,你需要自己稍加練習(xí)來掌握它青扔。


Step 17
步驟 17
Make some bling bling stars and brush up the white parts so they really shine. Just some simple finishing stuff.
制作一些一閃一閃的星星源织,并且擦亮它們白色的部分,這樣會(huì)讓它們真的閃閃發(fā)光微猖。最后谈息,添加些簡單的東西。
Create 2 new layers and place them on the very top and do like this:
新建兩個(gè)層凛剥,并像這樣將他們置于最頂層:

Step 18
步驟 18
Check over your image for weird stuff. The hand looks a little strange so far. Create a new layer and place it in the model mask. Pick a white brush to paint the edges of the hand so it looks sweet.
仔細(xì)檢查你的圖像侠仇,尋找那些不自然的地方。目前看來犁珠,手有些奇怪逻炊。新建一個(gè)層,并將它放在模特的剪切蒙版中犁享。使用白色筆刷來繪制手的邊緣余素,讓它看起來很甜美。
And here's the final picture!
接下來是最終成品饼疙!

